How to Use Quick Pay / Check Pay
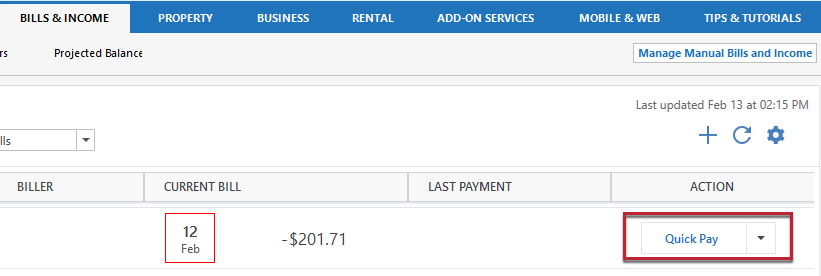
I just want to use Quick Pay to electronically pay an amount (OF MY CHOOSING) to an account that will accept electronic payment from Quicken. I keep getting caught up in the amount of my current monthly bill (none of Quicken's business) and scheduling future payments (I'll decide when to pay when I want to pay, thank you), just like it use to be years ago. Why can't I just enter the information for either Quick Pay or Check Pay on an image of a CHECK and let Quicken decide to electronically pay it or to send a check? So confusing and I've had/made too many mistakes. So now I pay online via my bank's website and then re-enter the transaction in Quicken. Way too many mistakes or forgotten entries doing that! HELP!
Answers
-
Hi @Dean Mechler,
Thanks for reaching out to the Quicken community!
If you haven’t tried this yet, I suggest following the steps below to set up and use Quick Pay and Check Pay.
To pay with Quick Pay:- Open Quicken
- Click Bills & Income tab.
- Click “+” then Online Biller
- Search for your biller
- Enter your login credentials for that biller
- Wait for the bill to sync
- Quicken will pull in: Amount due and due date
- Click the gear icon in the upper right.
- Select Pay Bills with Bill Manager.
- Review the Terms of Use and click Agree if you want to proceed.
- Complete the verification process (including the mobile verification, if prompted), then click Enable Accounts.
- In the Payment Accounts for Quicken Bill Manager screen, select the account (usually checking) that you want to use to pay bills with and select Enable.
- Follow the process to enable the account
- Click Done, return to the Bills & Income tab, and start paying bills with Quick Pay.
To pay with Check Pay:- Click the Bills & Income tab.
- Click "+" > Manual Biller
- In the Add Bill Reminder screen, enter or select the name of the payee in the Pay to field and click Next.
- Select Allow paying with Check Pay.
Provide the following information in the Edit Payee screen:
- Payee: The name of the person or biller receiving the payment. This should already be filled in.
- Account Number: This is the account number of your payee. This field is optional, but it is helpful when making payments to an account.
- Address: The address where the check will be delivered to the payee.
- City, State, and Zip: These fields need to be entered correctly to deliver the check to the payee.
- Verify the address you have given. Review your address and select Done.
- Click Done on the Add Bill Reminder screen.
- The new bill will appear on the Biller list with the default action as Check Pay.
Here is our support article about
I hope this helps!
Quicken Carlos
Make sure to sign up for the email digest to see a round up of your top posts.
0


