Empower Retirement / MassMutual Web Connect Returns No Account Details
JL1979
Quicken Windows Subscription Member
I recently added a new account for my Empower Retirement account (formerly Massmutual). Quicken shows this as an option and the URL matches my account login. When I go through the process I don't get any errors and even go through the two factor authentication and Quicken tells me it is successful, but there are no transactions or balances. In fact it deleted the manual account balances that I had entered previously. I tried the "reset account" feature and again Quicken tells me it was successful but I get no account details or balances. I even deleted the account to try and start over and the same thing happens. If Quicken thinks I have set up Web Connect but nothing is downloading, then what is the issue? I also reached out to Empower and they said "Please work with Quicken to determine their compatibility with RetireSmart." I am hoping this is only a temporary issue because MassMutual was bought by Empower and recently said the website was changing, but I don't understand why it would not work when Quicken is pointing to the same URL as my login. Would Quicken tell me it was successful if it isn't compatible with the website/server?
0
Answers
-
Hello @JL1979,
Thank you for contacting the Quicken Community, though I do apologize that you are experiencing this issue.
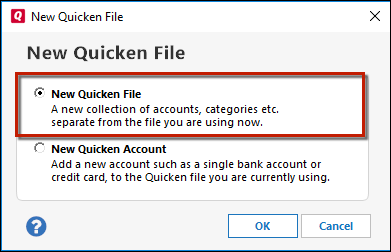
First, I suggest creating a test file and adding the Mass Mutual account(s) to see if it produces the same issue with transactions and account details not downloading. It is recommended to save a backup before proceeding with troubleshooting steps in the event that you would like to return to your original starting position. Below are instructions on how to create a test file:- Choose File menu > New Quicken File.

- Select New Quicken File.

- Click OK.
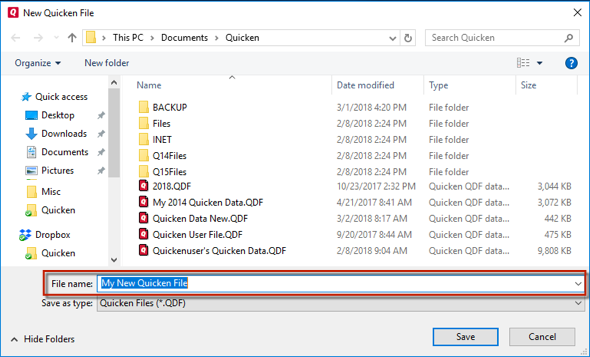
- In the File name field, enter the name of the new file, then click Save. Use a name like "Test File" to tell it apart from your main file.

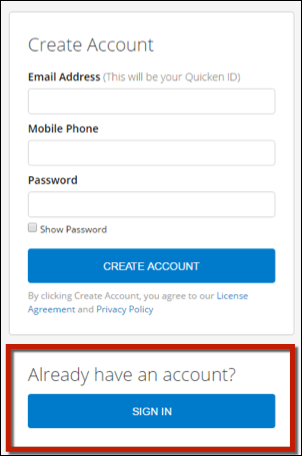
Don't use any of these characters: * ? < > | " : \ / (asterisk, question mark, left and right-angle bracket, pipe, straight quotation marks, colon, BACKSLASH, FORWARD SLASH). Also, don't add the .qdf extension; Quicken does that for you.- Sign in with your Quicken ID. If you are prompted to create a Quicken ID but already have one, click Sign In under the Create Account prompt.

- Select to not use Mobile.
- Click Add Account to start adding accounts to the new file.
After adding accounts, see if you are experiencing the same problems in this test file.
Please let me know how this goes, I look forward to hearing your response.
-Quicken Jasmine
Make sure to sign up for the email digest to see a round-up of your top posts.
0
This discussion has been closed.
Categories
- All Categories
- 43 Product Ideas
- 36 Announcements
- 228 Alerts, Online Banking & Known Product Issues
- 21 Product Alerts
- 497 Welcome to the Community!
- 677 Before you Buy
- 1.3K Product Ideas
- 54.4K Quicken Classic for Windows
- 16.5K Quicken Classic for Mac
- 1K Quicken Mobile
- 814 Quicken on the Web
- 116 Quicken LifeHub
