This discussion was created from comments split from:
BECU OL-294-A error Again
.
I Also have this error on my BECU checking account. Just started a few days ago like the others, been waiting for it to fix itself. But I cannot deactivate online services. The account has a flag on it that says I have one transaction to review. This flag has been there for many years. I called for help on this many years ago and the agent could not eliminate this flag or find the transaction that is flagged. His solution was to delete the account and loose all my history. This is my primary account and goes back to 2004. What point is there to entering all of this data into my computer if I cannot search and report on historic data? What do I need to do? My other BECU accounts are updating fine.
Hello @davidgiberson,
Thank you for letting us know that you are seeing these issues. To troubleshoot the issue with the red flag that won't go away (and won't let you deactivate the account), please backup your Quicken file and follow these steps from our article on when Quicken says there are transactions to view, but you don't see any:
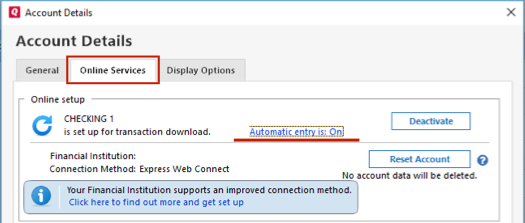
1. Press Ctrl+A on the keyboard to bring up the Account List, then click the Edit button next to the affected account in the list.
2. In the Account Details window, click on the Online Services tab then click Automatic entry is.
3. Select Yes on the next dialog box and click OK. Automatic entry should show as "On" now.
4. Click OK to close the Account Details window, then click Done on the Account List.
5. Close Quicken, wait a few seconds, then re-open it. The transactions should appear upon re-opening Quicken.
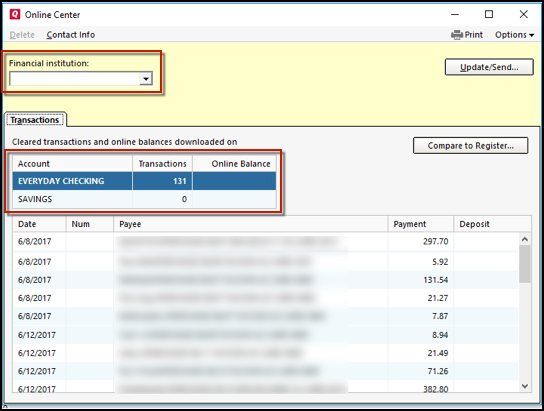
Quicken will show you downloaded transactions in multiple locations. The following information shows you how to check for downloaded transactions in the account register and Online Center.
4. Select Transactions.
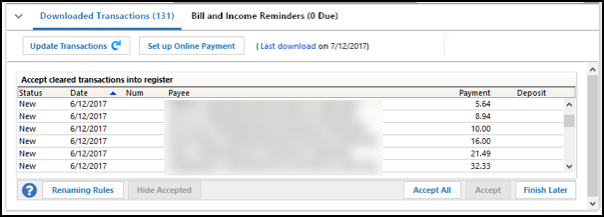
If the Quicken data file is damaged, you might receive prompts about downloaded transactions when you don't have any downloaded transactions.
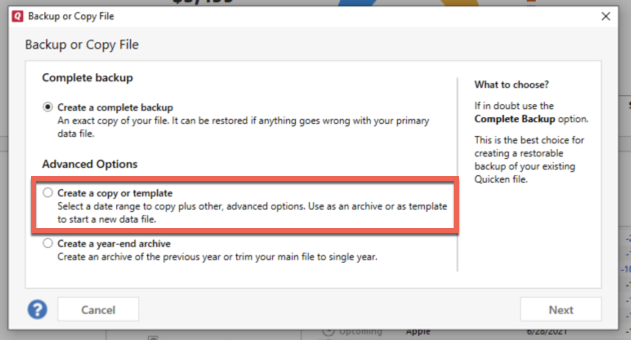
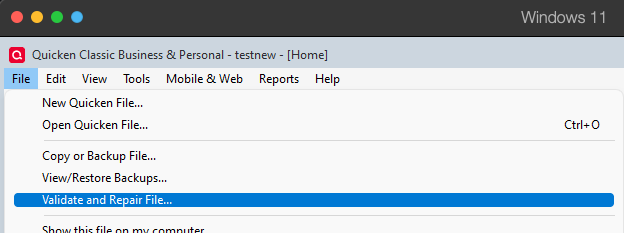
Quicken has a built-in utility, Validate, that will correct many data issues. Please note this does not correct all issues and these steps should be taken if the other steps outlined did not resolve the problem.
Note: Depending on the size of your data file, you may need to wait a while for the validation process to finish. Do not use the Task Manager to close Quicken. Quicken displays an error message if it cannot validate the file. If Quicken is able to validate the file and any errors are found, Quicken displays a message, "Data losses were found in your file." You can view the log file for more information.
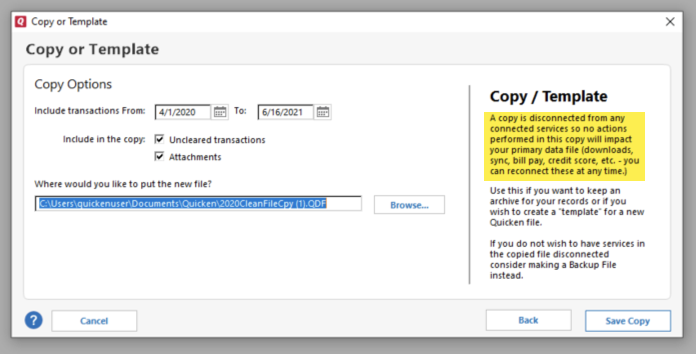
When the validation process is complete, verify if the issue is corrected. If the issue is not corrected, return to your main file. For instructions on switching between Quicken files, click here.
If the issue is corrected in the copy, you will need to Reactivate your accounts for transaction download, and use the copy as your main file going forward.
Please let me know how it goes!
We haven't heard back from you in a while. Do you still need assistance?
Check back and let us know! Thank you.
Hello again,
Checking in once more before this thread is closed. Let us know if you still need assistance.
Thank you!
Due to the lack of response, I went ahead and closed this post.
If you still require assistance, please feel free to start a new post.