Teachers Credit Union recently upgraded their website, effectively preventing me from connecting to

Teachers Credit Union recently upgraded their website, effectively preventing me from connecting to Quicken via the old site. The only way I could connect was by adding an account using TCU's upgraded website. However, Quicken does not let me add two of the three accounts associated with TCU. When Quicken finds the 3 accounts, instead of linking them to a current account or adding them, it tells me I do not need to do either. I even deleted the one account so I could add it as a new account and it won't let me do that. This has been going on for months. What do I do.
Answers
-
Hello @Jim Fair,
Thank you for reaching out to the Community and telling us about your issue, though I apologize that you are experiencing this.
If you don't mind, I'd like to start off by having you create a new (test) file to see if you experience the same issue in a new file as well. In doing so, we will be able to determine whether or not this is caused by an issue within your current data file.
Follow the steps below to create a test file:- Choose File menu > New Quicken File.

- Select New Quicken File.

- Click OK.
- In the File name field, enter the name of the new file, then click Save. Use a name like "Test File" to easily be able to tell it apart from your main file.
 Don't use any of these characters: * ? < > | " : \ / (asterisk, question mark, left and right-angle bracket, pipe, straight quotation marks, colon, BACKSLASH, FORWARD SLASH). Also, don't add the .qdf extension; Quicken does that for you.
 - Sign in with your Quicken ID (if prompted). If you are prompted to create a Quicken ID, click Sign In under the Create Account prompt.
- Select to not use Mobile (if prompted).
- Click Add Account to try adding the accounts you were unable to add to your original file.
After adding accounts, see if you are experiencing the same problem in this test file. From there, you can then switch back to your original file.
Follow the steps below to switch files:
- Click the File menu.
- Look near the bottom of the options list.
- Select the data file you want to open.
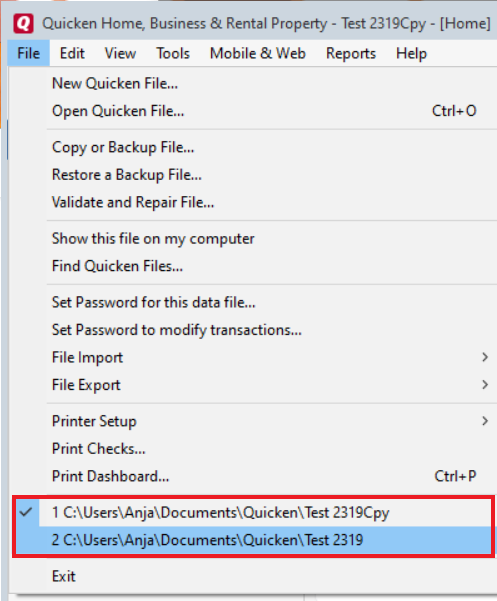
Quicken will list the most recently opened data files, with a checkmark next to the file you are currently viewing.
Let us know how it goes!
-Quicken Anja
Make sure to sign up for the email digest to see a round up of your top posts.0 - Choose File menu > New Quicken File.
-
Thank you Anja. Creating a new file now allows me to successfully connect to my credit union's new website. However, I lost all my categories, scheduled transactions and peripheral accounts. Is there any way to import these into the new file or do I have to rebuild everything? Thanks for your help!
0 -
Chiming in here for @Quicken Anja …
Now that we know that it's a problem with your existing Quicken data file and not a PC-wide problem, please try the following:- Make a copy of your data file:
Click File / Copy or Backup File. Select Create a Copy or Template. Click Next.
Do not change any Copy Option settings. Save file under a new name in same folder as current Quicken data file. - If Quicken reports an error creating the Copy file and you are using Q 2019 or newer repeat the Copy process, but this time press and hold SHIFT and CTRL while you click File / File Operations / Copy.
When prompted "Ignore errors that prevent file copy?" click "Yes". (On some systems, if SHIFT+CTRL doesn't get you the prompt, try just pressing and holding SHIFT) Note: This may cause some data loss. - Open the copied file in Quicken.
- Validate and Supervalidate the just copied file (Instructions below)
- The Copy process disconnected/deactivated all bank account connections. You will have to reactivate all accounts. Begin with reactivating your TCU accounts:
Use the Add Accounts process ("+" icon in the Accounts Sidebar title) to add the accounts and LINK them very carefully to the existing TCU account registers.
Theoretically, that should do the trick … I hope …
Validate and Supervalidate instructions
First save a backup file prior to performing these steps
Validate:
• Click File
• Select Validate and Repair File...
• Select Validate File
• If the data file contains investment accounts also select "Rebuild investing lots". If you suspect that a damaged Quotes Price History causes your problems, also select "Correct investing price history" functions "Delete" or "Repair and Rebuild".
• Click OK
• Close the Data Log
• Close Quicken (leave it closed for about 30 secs)
• Reopen Quicken and see if the issue persists.
Super Validate:
• Click File
• Press and hold both CTRL and Shift keys while you click Validate and Repair File...
• Select Supervalidate File
• Click OK
• Close the Data Log
• Close Quicken (leave it closed for about 30 secs)
• Reopen Quicken and see if the issue persists.0 - Make a copy of your data file:


Categories
- All Categories
- 65 Product Ideas
- 35 Announcements
- 222 Alerts, Online Banking & Known Product Issues
- 21 Product Alerts
- 704 Welcome to the Community!
- 673 Before you Buy
- 1.2K Product Ideas
- 54K Quicken Classic for Windows
- 16.4K Quicken Classic for Mac
- 1K Quicken Mobile
- 812 Quicken on the Web
- 115 Quicken LifeHub