Transactions going blank after software upgrade

I upgraded from Quicken Classic 2013 to 2019 on Windows 11 at the end of March. Since then, I have entered new transactions for April. I close the software and open it again and things look ok. I open and close my main QDF file and a second QDF file that I have for a separate set of accounts. After 2 or 3 times opening and closing, I open the main QDF again and my transactions for April are now blank!
The blank transactions cannot be deleted. I ran a Validate and a Super Validate on copies of the file and that erased the blank transactions so I am back to the end of March and have to enter the April transactions all over again. The April transactions seem to be "remembered" in the auto-suggest when I input them again. These are transactions in a bank account or credit card account. The other QDF file does not experience these problems, although it has much fewer transactions in total. My main QDF has all transactions going back 25 years, while the second one has maybe 8 years.
I had it in a linked Google Drive folder, but moved it to my C: and that has the same problem. The second QDF is working fine from the Google Drive folder.
Not sure what to do next. It just took me a few hours to catch up and now I'm back to square one.
Comments
-
Just to add, I have tried rebooting the computer. I took a backup after I finished re-entering all of the April transactions last time. When I restore the backup file, the transactions are blank.
0 -
Hello @kilogeo,
Thank you for letting us know you're seeing this issue. To help troubleshoot, please provide more information:
- When did you first notice this issue?
- You mentioned the file was on Google Drive while you were accessing it. Did you have the sync with Google Drive paused?
- How often does this happen (for instance, did this happen only once, does opening/closing multiple times reliably trigger this issue, etc.)?
I suspect this problem was caused by Google Drive trying to sync the file while you had it open in Quicken. For more information on using Quicken files with cloud services, please see this article:
If possible, please try restoring a backup from before the transactions vanished the first time, and confirm if everything works properly in that newly restored file. Note: Please make sure to restore the file directly to your local hard drive.
For instructions on restoring a backup, please follow these instructions from our article on backing up and restoring Quicken files:
Restore Quicken data
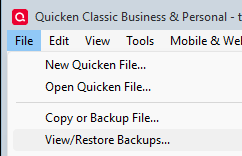
- Go to File > View/Restore Backups....
- Browse the Local and Online Backups tabs to find the backup file you want to restore. The Quicken backup file has the extension .QDF-Backup.
- Select the file to restore and click Restore Backup.
- Next, you will be given the option to overwrite the file you have open or to create a copy of the backup you're restoring.
- If you Create a copy, you will need to select a location to save the copy to and you will also need to give the copy a unique file name. After naming the file and selecting the location, click Save, then click Yes to open the restored file.
- What does it mean to overwrite a file?: Restoring a backup file replaces your current data with the data stored on the backup. Be aware that you'll lose any changes you made since the backup was created. If you want to preserve the current file, you must rename the current file or the file you are restoring. We recommend to avoid overwriting files.
Restore an automatic backup
Quicken creates a copy of your data every seven days and stores five of these copies in a BACKUP folder. If the backup file you've created becomes damaged, you may be able to restore an automatic backup and save yourself the need to re-enter data.
First, check to see if automatic backups are turned on (this is on by default)
- In Quicken, go to Edit > Preferences.
- Under Setup on the left, choose Backup.
- Make sure there is a check mark next to Automatic Backups.
- To the right of Automatic Backups, there is an Open/Change backup directory link that goes directly to your BACKUP folder - a good way of finding them fast!
- Choose to back up your Quicken data file after running Quicken X times (between 1 - 99).
- Choose how many backup data files you would like to save (between 1 - 99 copies).
If you don't have a manual backup from the correct timeframe, check for an automatic backup, and follow the steps below if there's one from the correct timeframe.
Then, restore the automatic backup
- Go to File > View/Restore Backups....

- Select the file to restore.
- Click Restore Backup.
- Next, you will be given the option to overwrite the file you have open or to create a copy of the backup you're restoring.
- If you Create a copy, you will need to select a location to save the copy to and you will also need to give the copy a unique file name. After naming the file and selecting the location, click Save, then click Yes to open the restored file.
- What does it mean to overwrite a file?: Restoring a backup file replaces your current data with the data stored on the backup. Be aware that you'll lose any changes you made since the backup was created. If you want to preserve the current file, you must rename the current file or the file you are restoring. We recommend avoiding overwriting files.
I hope this helps!
Quicken Kristina
Make sure to sign up for the email digest to see a round up of your top posts.
0 -
[Removed - Disruptive]
The problem started occurring within the first few uses of Quicken after upgrading to 2019.
I already surmised that the Google Drive may have been a problem, which is why I moved the file to my C: drive, where the problem persists.
Opening and closing the file triggers the problem. It did not happen just once.
0 -
Thank you for your reply,
Since it started fairly quickly after upgrading, it is possible that it's a file conversion issue. Have you tried converting the original file again?
Thank you!
Quicken Kristina
Make sure to sign up for the email digest to see a round up of your top posts.
0 -
Hello @kilogeo,
We haven't heard back from you in a while. Do you still need assistance?
Check back and let us know! Thank you.
Quicken Kristina
Make sure to sign up for the email digest to see a round up of your top posts.
0