Different reconcile windows for savings account

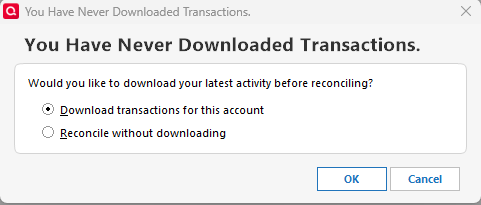
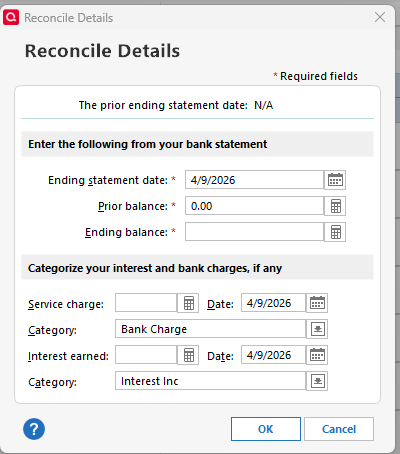
I set up my bank accounts manually and reconcile them manually also (my preference). When I set up my latest savings account the reconcile window is different than other accounts; and, confirming the account details, the account is not set up to download transactions. The first screenshot below is how this account's reconcile window looks. The second screenshot is how all my other banking accounts' reconcile window looks when I launch Ctrl-R. I reviewed the settings and cannot figure out how to get this one account to generate a reconcile window that is the same as all others. What am I missing?! I am using Quicken Classic for Windows Premier. The software is up to date.
Quicken user since the 1980s
Comments
-
Hello @JD99,
Thanks for reaching out! This usually comes down to how Quicken is treating the account behind the scenes.
The first reconcile window you’re seeing typically appears when Quicken believes the account is set up for online services, even if you’re not actively downloading transactions. The second (what you’re expecting) is the standard manual reconcile window.
For the account showing the different reconcile screen, please try this:
- Right-click the account name in the left sidebar
- Select Edit/Delete Account
- Go to the Online Services tab
From there:
- If you see a Deactivate button, go ahead and click that to fully remove any online connectivity
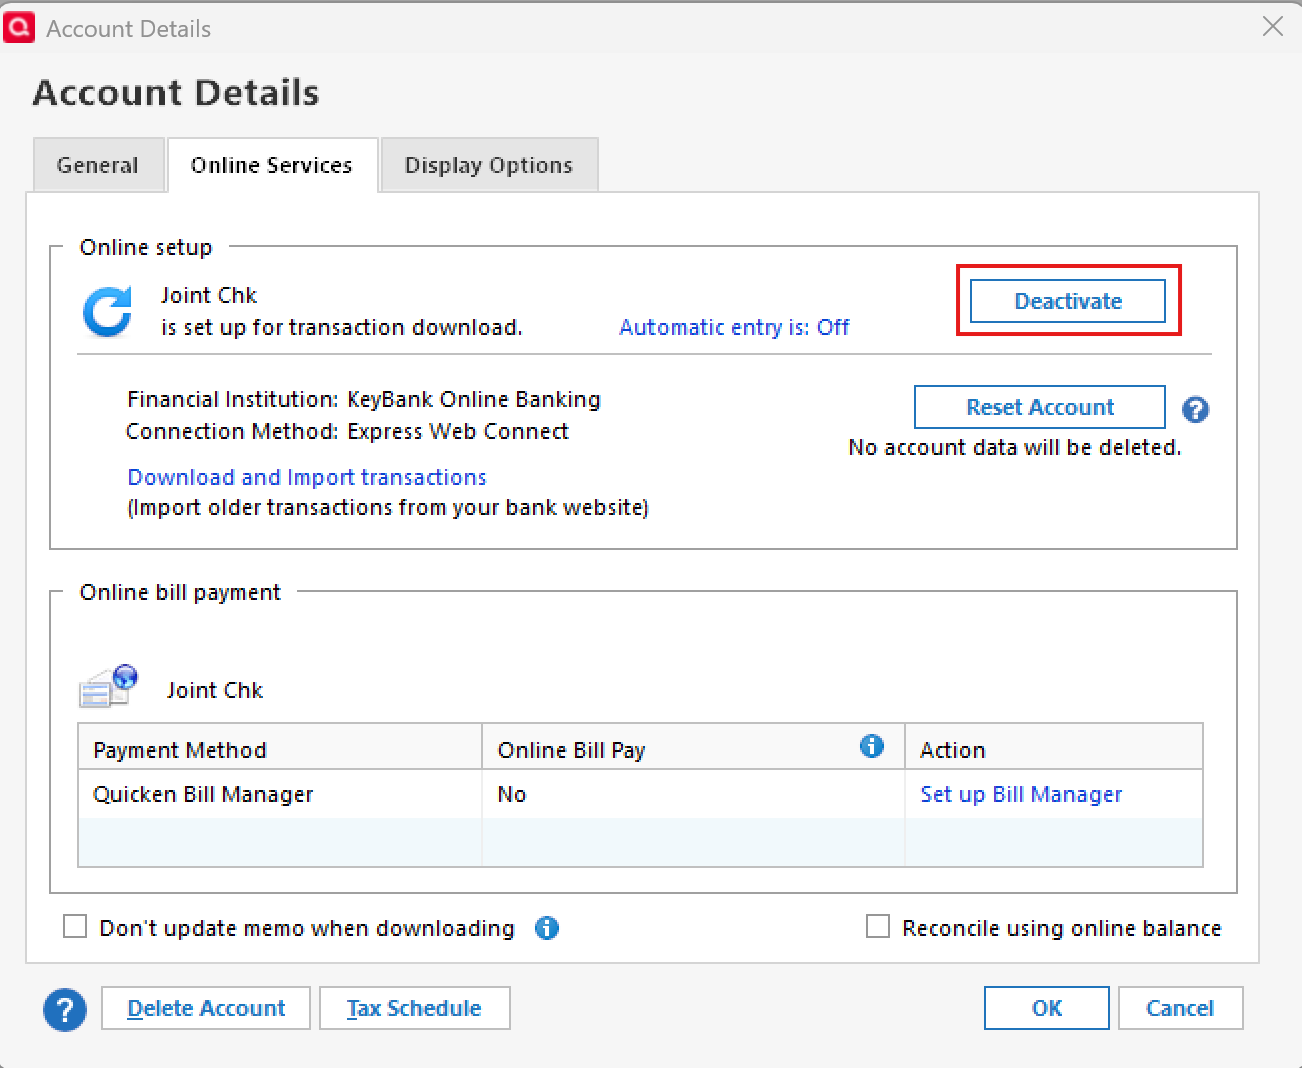
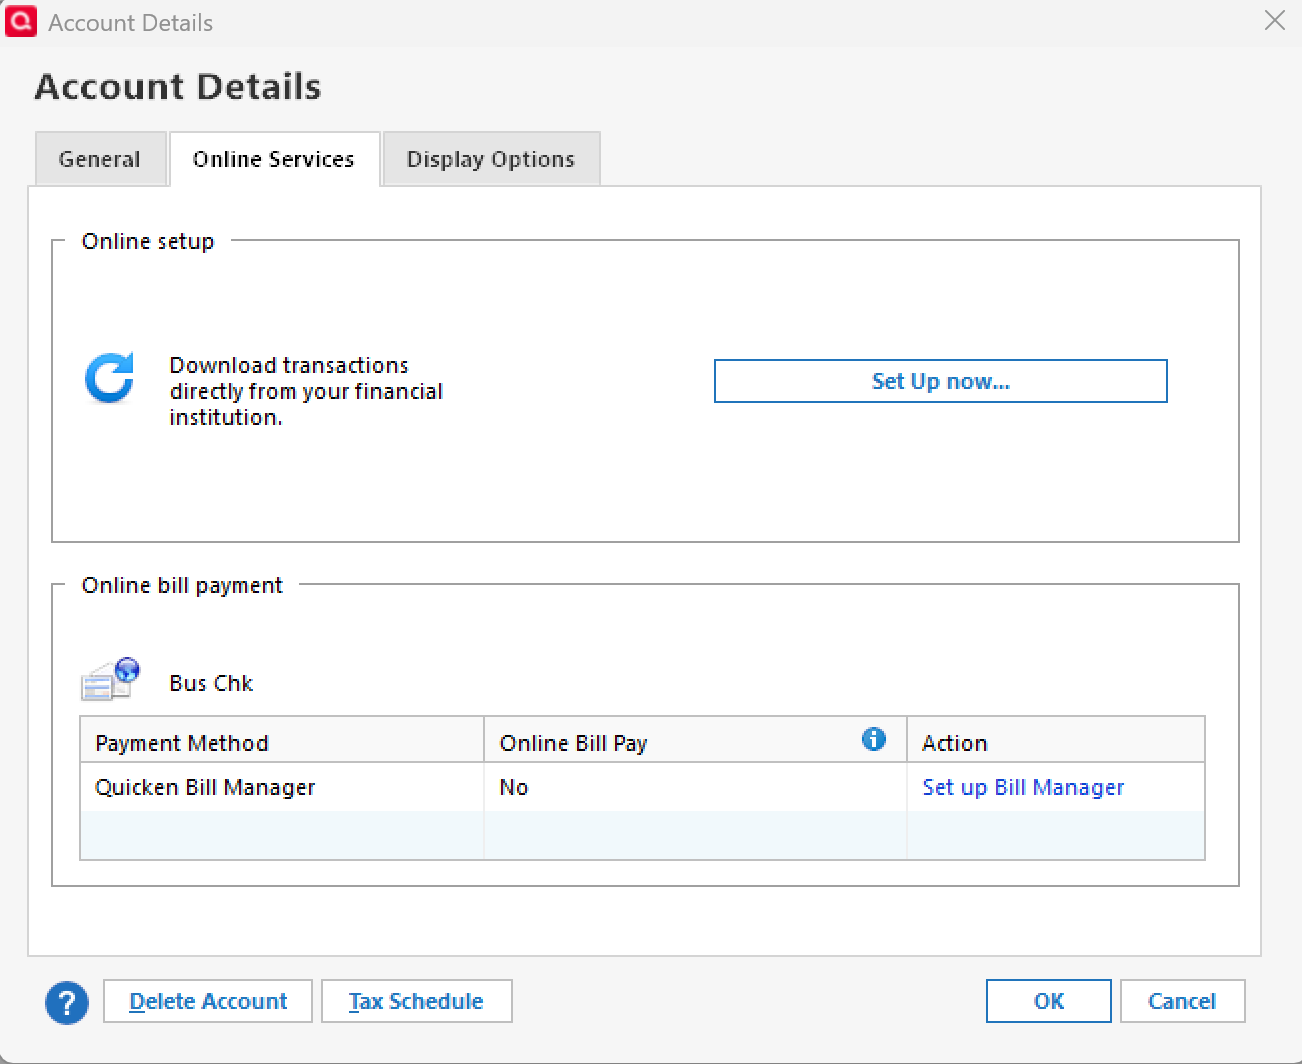
- If you see Set up now…, then the account is already considered manual and we’ll want to look a bit deeper
Once any connection is fully deactivated, try reconciling again (Ctrl + R) and see if the window matches your other accounts.
Let me know what you see in that tab! Thank you.
-Quicken Anja
Make sure to sign up for the email digest to see a round up of your top posts.1 -
Thank you very much for your quick reply, but I already checked that in Account Details. That window shows Set up now… So, the plot thickens…
Quicken user since the 1980s
0 -
@JD99 Thanks for following up!
I suggest that you please try validating and/or super validating your data file. However, I do recommend that you first save a backup file prior to performing these steps.
Validate:
- File
- Validate and Repair File...

- Validate File
- Click OK
- Close the Data Log
- Close Quicken (leave it closed for at least 30 secs)
- Reopen Quicken and see if the issue persists.
If the issue persists, proceed to Super Validate. If the issue is resolved after performing validation, then please disregard the instructions to Super Validate.
Super Validate:- File
- Hold CTRL + Shift and click Validate and Repair File...
- Super Validate File

- Click OK
- Close the Data Log
- Close Quicken (leave it closed for at least 30 secs)
- Reopen Quicken and see if the issue persists.
I hope this helps!
-Quicken Anja
Make sure to sign up for the email digest to see a round up of your top posts.0 -
Unfortunately, neither the validate nor the super-validate resolved the issue.
Quicken user since the 1980s
0 -
Thank you for your reply,
Since the Validate and Super Validate did not correct the issue, the next step is to restore a backup from before the issue began, if possible. To restore a backup, please follow these steps from our article on backing up and restoring Quicken files:
Restore Quicken data
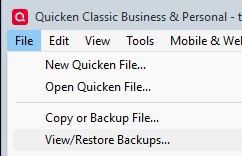
- Go to File > View/Restore Backups....
- Browse the Local and Online Backups tabs to find the backup file you want to restore. The Quicken backup file has the extension .QDF-Backup.
- Select the file to restore and click Restore Backup.
- Next, you will be given the option to overwrite the file you have open or to create a copy of the backup you're restoring.
- If you Create a copy, you will need to select a location to save the copy to and you will also need to give the copy a unique file name. After naming the file and selecting the location, click Save, then click Yes to open the restored file.
- What does it mean to overwrite a file?: Restoring a backup file replaces your current data with the data stored on the backup. Be aware that you'll lose any changes you made since the backup was created. If you want to preserve the current file, you must rename the current file or the file you are restoring. We recommend to avoid overwriting files.
If you don't have any manual backups in the needed date range, you can restore an automatic backup by following the steps below.
Restore an automatic backup
Quicken creates a copy of your data every seven days and stores five of these copies in a BACKUP folder. If the backup file you've created becomes damaged, you may be able to restore an automatic backup and save yourself the need to reenter data.
First, check to see if automatic backups are turned on (this is on by default)
- In Quicken, go to Edit > Preferences.
- Under Setup on the left, choose Backup.
- Make sure there is a check mark next to Automatic Backups.
- To the right of Automatic Backups, there is an Open/Change backup directory link that goes directly to your BACKUP folder - a good way of finding them fast!
- Choose to back up your Quicken data file after running Quicken X times (between 1 - 99).
- Choose how many backup data files you would like to save (between 1 - 99 copies).
Then, restore the automatic backup
- Go to File > View/Restore Backups....

- Select the file to restore.
- Click Restore Backup.
- Next, you will be given the option to overwrite the file you have open or to create a copy of the backup you're restoring.
- If you Create a copy, you will need to select a location to save the copy to and you will also need to give the copy a unique file name. After naming the file and selecting the location, click Save, then click Yes to open the restored file.
- What does it mean to overwrite a file?: Restoring a backup file replaces your current data with the data stored on the backup. Be aware that you'll lose any changes you made since the backup was created. If you want to preserve the current file, you must rename the current file or the file you are restoring. We recommend to avoid overwriting files.
Please let me know how it goes!
Quicken Kristina
Make sure to sign up for the email digest to see a round up of your top posts.
0 - Go to File > View/Restore Backups....
-
Couldn't find a solution, so I added a second account, moved all the transactions from the old account to the new (account was open about a year, so there were not a lot of transactions), and once I confirmed the new balance to be correct and the old balance to be zero, I deleted the old, original account. Somehow, the original account was corrupted to "think" that it was an account to be reconciled with a download.
Quicken user since the 1980s
1 -
Thank you for the follow-up,
I'm glad to hear you found a solution, and thank you for sharing the process you used.
Hopefully, this will help others encountering similar issues!
Quicken Kristina
Make sure to sign up for the email digest to see a round up of your top posts.
0